开发流程
环境搭建
参考文章:
pnpm
使用 pnpm 进行包管理,首先当然全局安装 pnpm,并初始化项目,加入 vite
npm i -g pnpm
pnpm create vite
输入项目名称 dance-ui、选择 React、TypeScript + SWC,进入项目,下载依赖
pnpm i
-w,--workspace-root
在根目录执行命令,比如在根目录安装依赖,那么这个依赖可以在所有的 packages 中使用
-F <package_name>,--filter <package_name>
在过滤的指定包运行命令,我们可以通过下面的命令在指定的 package 安装依赖,这个依赖只可以在 package 中使用
Husky
Husky +commitlint 可以帮助我们检查提交的 commit 信息,它强制约束我们的 commit 信息必须在开头附加指定类型,用于标示本次提交的大致意图。遵循 Angular 提交信息规范
pnpm add @commitlint/cli @commitlint/config-conventional commitlint husky -D
Prettier + ESLint
首先安装 ESLint,交互式选择自己的需要,参考文章:vue3+ts+vite 项目中使用 eslint+prettier+stylelint+husky 指南
pnpm add eslint -D
pnpm eslint --init
生成 .eslintrc.cjs文件如下:
module.exports = {
  env: {
    browser: true,
    es2021: true,
  },
  extends: ['plugin:react/recommended', 'standard-with-typescript'],
  overrides: [],
  parserOptions: {
    ecmaVersion: 'latest',
    sourceType: 'module',
  },
  plugins: ['react'],
  rules: {},
}
在 package.json 文件中的 script 中添加 lint 命令
{
  "scripts": {
    // eslint . 为指定lint当前项目中的文件
    // --ext 为指定lint哪些后缀的文件
    // --fix 开启自动修复
    "lint": "eslint . --ext .js,.ts,.jsx,.tsx --fix"
  }
}
新建 prettier 配置文件 .prettierrc.js,需注意的是引入 tailwind prettier 插件和 tailwindConfig 都是后边再加的。
module.exports = {
  tabWidth: 2, // Tab = 2空格
  useTabs: false, // 不要用 Tab
  semi: false, // 句尾不要分号
  singleQuote: true, // 在jsx中使用单引号代替双引号
  quoteProps: 'as-needed', // 仅在必需时为对象的key添加引号
  jsxSingleQuote: false, // jsx中使用单引号
  trailingComma: 'all', // 多行时尽可能打印尾随逗号
  bracketSpacing: true, // 在对象前后添加空格 - eg: { foo: bar }
  jsxBracketSameLine: true, // 在jsx中把 '>' 是否折行
  endOfLine: 'lf', // 行尾序列 Linux LF
  embeddedLanguageFormatting: 'auto',
  printWidth: 128,
  // plugins: [require('prettier-plugin-tailwindcss')],
  // tailwindConfig: './tailwind.config.js',
}
使用 eslint-config-prettier + eslint-plugin-prettier解决 ESLint 和 prettier 冲突问题。
pnpm add eslint-config-prettier eslint-plugin-prettier -D
在 .eslintrc.json 中 extends 的最后添加一个配置
{
    extends: [
    'plugin:react/recommended',
    'standard-with-typescript',
+    // 新增,必须放在最后面
+    'plugin:prettier/recommended'
  ],
}
再加个新的插件:eslint-plugin-react-hooks 自动
Tailwind & postcss
首先安装 Tailwind CSS 和 postcss、autoprefixer 然后运行 tailwindcss init -p 生成 tailwind 配置文件
pnpm add -D tailwindcss postcss autoprefixer
npx tailwindcss init -p
在 tailwind.config.cjs 中配置文件路径
/** @type {import('tailwindcss').Config} */
module.exports = {
  content: ['./index.html', './src/**/*.{js,ts,jsx,tsx}'],
  theme: {
    extend: {},
  },
  plugins: [],
}
将每个 Tailwind 层的 @tailwind 指令添加到您的 ./src/index.css 文件中。
@tailwind base;
@tailwind components;
@tailwind utilities;
然后就可以愉快使用了~
改进 - monorepo - pnpm-workspace.yaml
pnpm + monorepo + changeset 实现多包管理和发布
新建 pnpm-workspace.yaml 文件,定义工作空间的根目录,并能够使您从工作空间中包含 / 排除目录 。 默认情况下,包含所有子目录。
packages: # 所有在 packages/ 子目录下的 package
  - 'packages/**'
  # 不包括在 test 文件夹下的 package
  - '!**/test/**'
创建 packages 文件夹,创建 components 包,进入该目录并初始化
mkdir packages/components
cd
pnpm init
将生成的 package.json 的 name 改为@dance-ui/components,再将外层的脚本及 src 文件夹挪进来
{
  "name": "@dance-ui/components",
  "version": "1.0.0",
  "description": "🌸 A simple and elegant component library.",
  "scripts": {
    "dev": "vite",
    "test": "echo \"Error: no test specified\" && exit 1",
    "build": "tsc && vite build",
    "preview": "vite preview",
    "lint": "eslint . --ext .js,.ts,.jsx,.tsx --fix"
  },
  "keywords": [],
  "author": "",
  "license": "ISC"
}
将 tsconfig.json 中的 include 改为
{
  "include": ["packages/**/*.ts", "packages/**/*.d.ts", "packages/**/*.tsx"]
}
将根目录下的脚本改为执行该包下的 -C <path>, --dir <path> 表示将 <path> 设置为 pnpm 的运行目录,而不是当前目录
pnpm run -C packages/components dev
pnpm run -C packages/components lint
现在根目录的 package.json 如下
{
  "name": "dance-ui",
  "private": true,
  "version": "0.0.0",
  "description": "🌸 A simple and elegant component library.",
  "repository": "https://github.com/dancing-team/dance-ui",
  "type": "module",
  "workspaces": ["packages/*"],
  "scripts": {
    "dev": "pnpm run -C packages/components dev",
    "lint": "pnpm run -C packages/components lint"
  },
  "dependencies": {
    "react": "^18.2.0",
    "react-dom": "^18.2.0"
    // ...
  },
  "devDependencies": {
    "@types/react": "^18.0.26",
    "@types/react-dom": "^18.0.9"
    // ...
  }
}
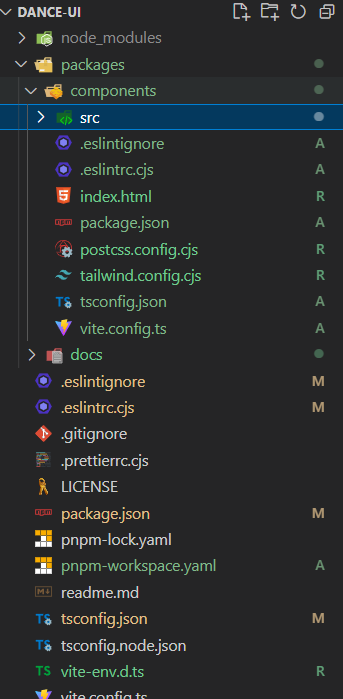
项目的目录结构如下:
打包配置
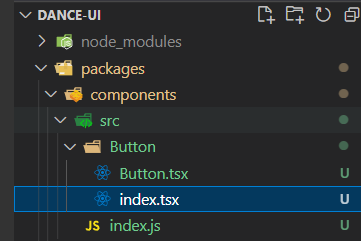
写一个最基础的 button 组件,将其导出,改造下目录结构:
利用 vite 的 库模式进行打包
首先将 vite.config.ts 配置如下
import { defineConfig } from 'vite'
import react from '@vitejs/plugin-react-swc'
import { resolve } from 'path'
import dts from 'vite-plugin-dts'

// https://vitejs.dev/config/
export default defineConfig({
  plugins: [
    react(),
    dts({
      //指定使用的tsconfig.json
      tsConfigFilePath: './tsconfig.json',
    }),
    //因为这个插件默认打包到es下,我们想让lib目录下也生成声明文件需要再配置一个
    // dts({
    //   outputDir: 'lib',
    //   tsConfigFilePath: './tsconfig.json',
    // }),
  ],
  build: {
    target: 'modules',
    //打包文件目录
    outDir: 'dist',
    //压缩
    minify: false,
    // 内联 css
    // cssCodeSplit: true,
    rollupOptions: {
      // 确保外部化处理那些你不想打包进库的依赖
      external: ['react', 'react-dom'],
      output: {
        // 在 UMD 构建模式下为这些外部化的依赖提供一个全局变量
        globals: {
          react: 'react',
          'react-dom': 'react-dom',
        },
      },
    },
    lib: {
      entry: 'src/index.ts',
      name: 'dance-ui',
      fileName: 'dance-ui',
    },
  },
})
tailwind 的打包前,需要先把 tailwind 自己的预设重置关掉:tailwind.config.js 中增加
module.exports = {
+  corePlugins: {
+    preflight: false,
+  }
}
文档站环境搭建
使用 Docusaurus 搭建文件站
npx create-docusaurus@latest example classic --typescript
vercel 部署
npm 发包
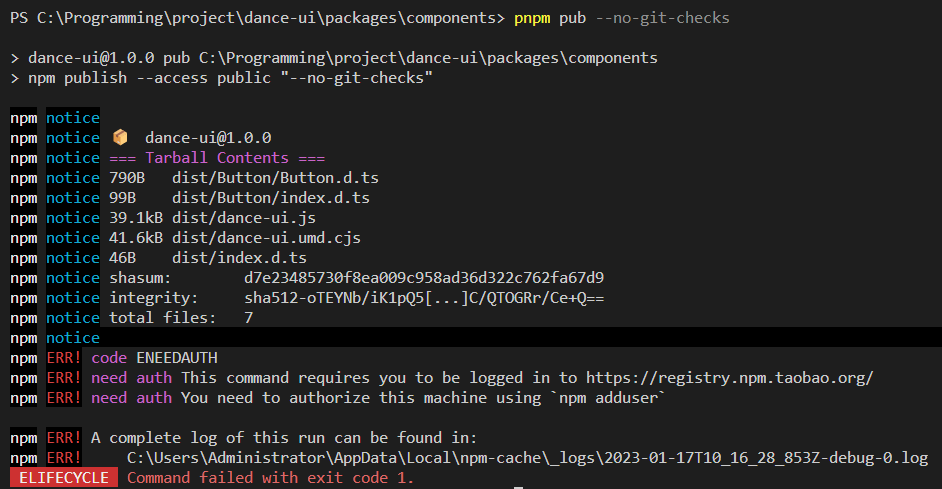
在 packages/components/package.json 中加入发布脚本 pub, 利用 npm publish 进行发布
然后报错,怎么回事呢。
{
  "scripts": {
    "pub": "npm publish --access public"
  }
}
本地发包需要注册登录 npm:npm adduser 输入你的一些信息

ps: 需要将镜像源切到 npm 官方,可以使用 nrm 管理
查看当前 npm 登录人 npm whoami
发布成功,注意我这里使用的两步验证发的

preinstall & changesets
preinstall 只允许 pnpm
当在项目中使用 pnpm 时,如果不希望用户使用 yarn 或者 npm 安装依赖,可以将下面的这个 preinstall 脚本添加到工程根目录下的 package.json 中:
{
  "scripts": {
    "preinstall": "npx only-allow pnpm"
  }
}
preinstall 脚本会在 install 之前执行,现在,只要有人运行 npm install 或 yarn install,就会调用 only-allow 去限制只允许使用 pnpm 安装依赖。
使用 changeset version 提交版本修改
changesets 使用:使用 Changesets 自动版本管理
根目录下安装 @changesets/cli 并初始化
pnpm install @changesets/cli -w -D && npx changeset init
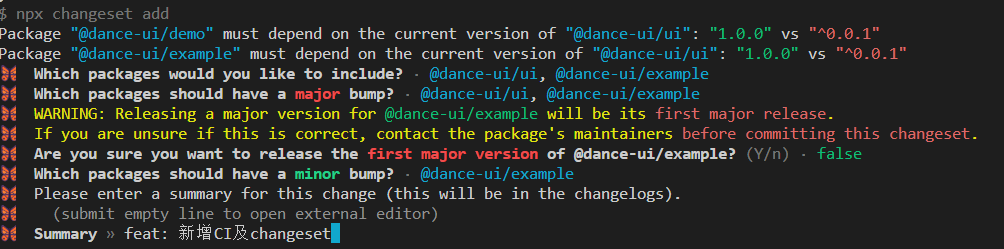
执行 npx changeset add 选择本次 changeset 需要发布的包
在根目录的 package.json 中新增 1 个 script 方便后续使用
"version": "changeset version"
版本号一般有三个部分,以.隔开,就像 X.Y.Z,其中
X:主版本号,不兼容的大改动,major Y:次版本号,功能性的改动,minor Z:修订版本号,问题修复,patch 每个部分为整数(>=0),按照递增的规则改变。
npx changeset version
执行后之前生成的 stale-shrimps-design.md 会被消费掉并修改对应的子包下的 package.json 并生成 CHANGELOG.md
自动化发布:实现自动化发布
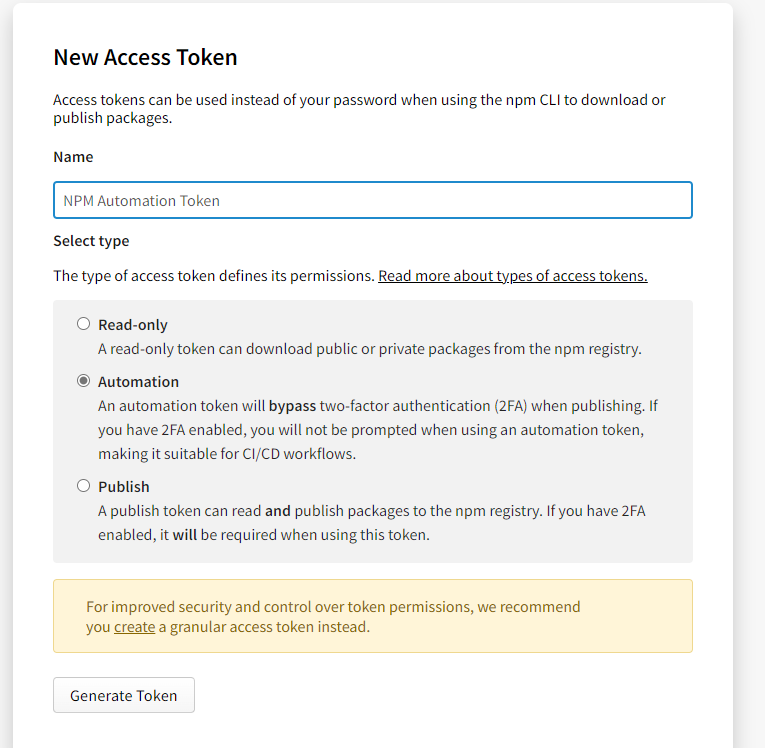
NPM_TOKEN 的获取
在 npm 官网 生成 Npm 私钥,注意选择 Automation
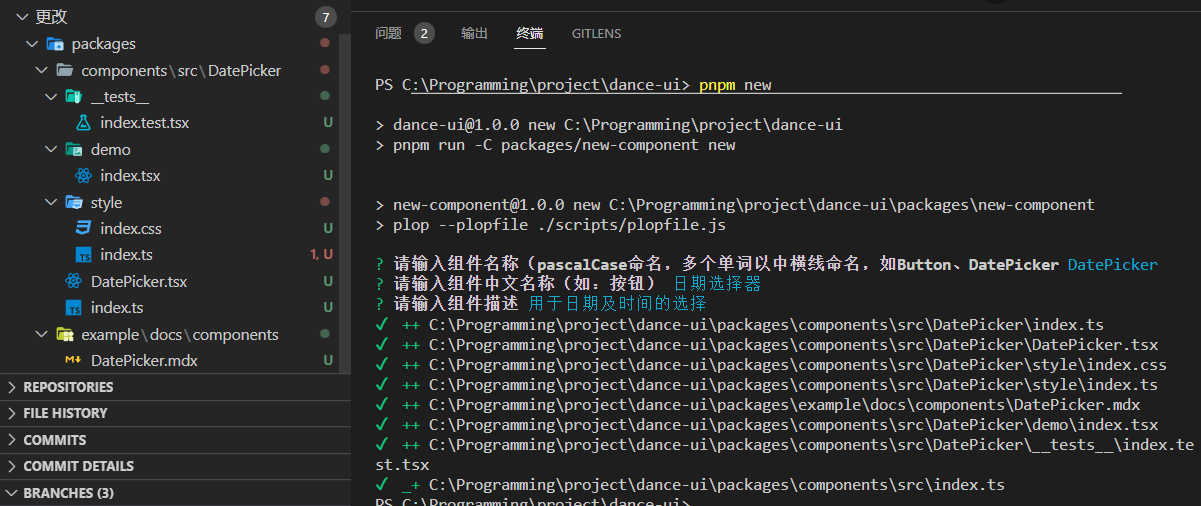
编写 new 脚本 新建组件框架
思路如下:
- 创建组件模板,预留动态信息插槽(组件名称,组件描述等等);
- 基于 inquirer.js 询问动态信息;
- 将信息插入模板,渲染至 components 文件夹下;
- 向 components/index.ts 插入导出语句。
新建 add-component 子包 安装 plop
mkdir packages/add-component
cd  packages/add-component
pnpm init
pnpm add -D plop
新增 scripts 和 templates 文件夹用于存放脚本和模板
mkdir scripts && mkdir templates
cd scripts
新增 new 脚本
// packages/add-component/package.json
"scripts": {
+ "new": "plop --plopfile ./scripts/plopfile.js"
},
接下来就是编写配置文件和组件模板了,见
使用 React-testing-library 编写组件测试
第一步:安装 Jest、React testing library、Jest-dom
cd packages/components
pnpm i -D @testing-library/react @testing-library/jest-dom jest @types/jest ts-node @types/testing-library__jest-dom
pnpm i -D @babel/preset-react @babel/preset-typescript @babel/preset-env
第二步:配置 jest 及 babel 通过全局的 Jest 命令行,在项目下生成 Jest 配置。 先 全局安装 Jest, 然后初始化配置文件
npm install -g jest
jest --init
jest.config.ts 修改如下:
export default {
  clearMocks: true,
  collectCoverage: true,
  coverageDirectory: 'coverage',
  coverageProvider: 'v8',
  setupFilesAfterEnv: ['@testing-library/jest-dom/extend-expect'],
  testEnvironment: 'jsdom',
}
新建 babel.config.cjs 文件 修改如下:
module.exports = {
  presets: [
    [
      '@babel/preset-env',
      {
        targets: {
          node: 'current',
        },
      },
    ],
    [
      '@babel/preset-react',
      {
        runtime: 'automatic',
      },
    ],
    '@babel/preset-typescript',
  ],
}
然后 pnpm test 就可以愉快工作啦
组件开发
Icon 图标
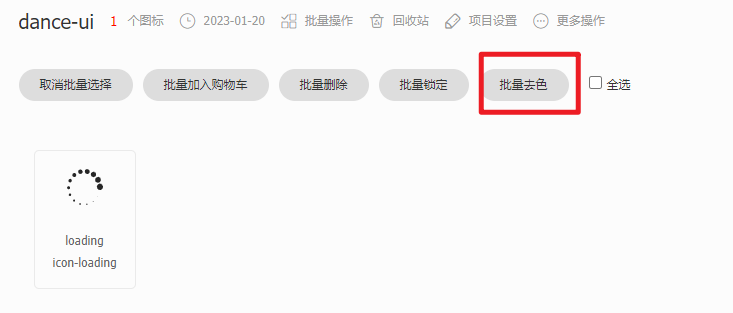
使用 Iconfont Symbol 方式引入:iconfont
- 添加到 iconfont 项目时记得进行一键去色
步骤
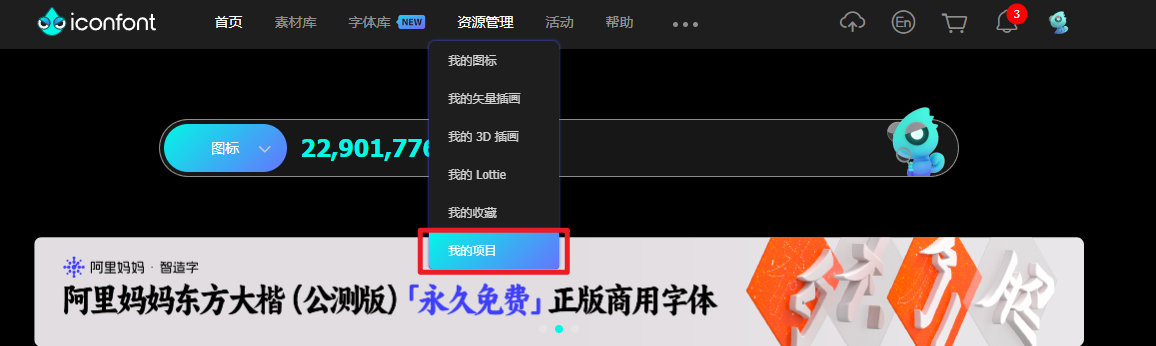
添加新项目
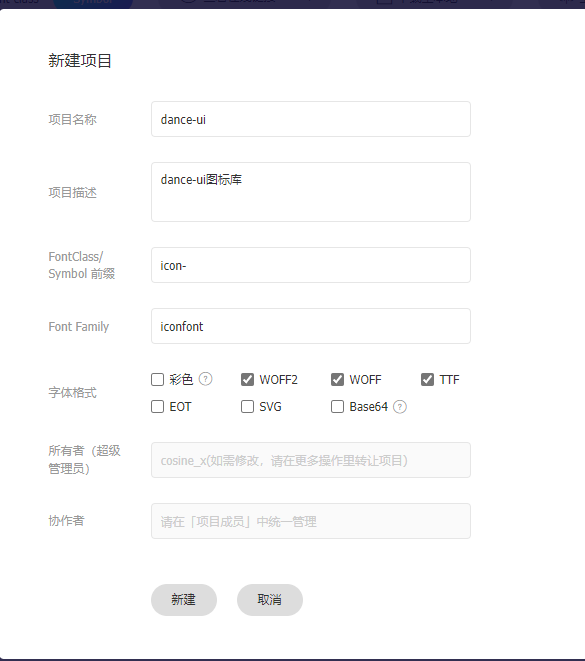
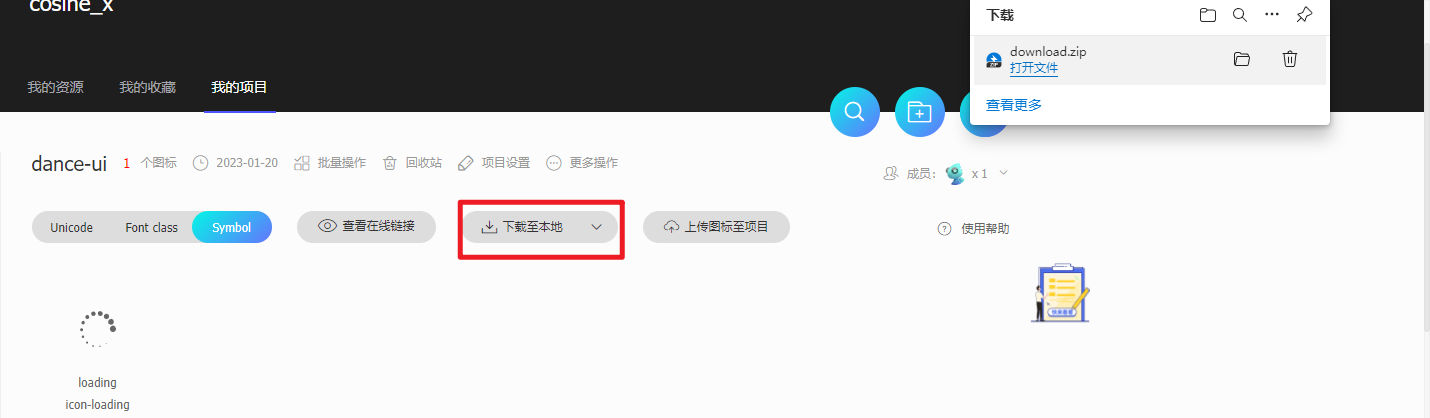
找到合适的图标添加入项目后,进行一键去色,方便后续自定义图标颜色(针对单色图标)
下载至本地,将其中的 iconfont.js 拿出来放到项目中(
在全局 css 中加入
@layer base {
  .dd__icon {
    width: 1em;
    height: 1em;
    overflow: hidden;
    vertical-align: -0.15em;
    fill: currentColor;
  }
}
在 Icon 组件中如此使用即可
import './script/iconfont.js'

const IconFont: React.FunctionComponent<IconProps> = ({ type, style, className, onClick }) => {
  return (
    <svg className={classNames(`dd__icon`, className)} style={style} aria-hidden="true" onClick={onClick}>
      <use xlinkHref={`#icon-${type}`}></use>
    </svg>
  )
}